Document Linker Tutorial
Introduction
This example uses the form features of a page.
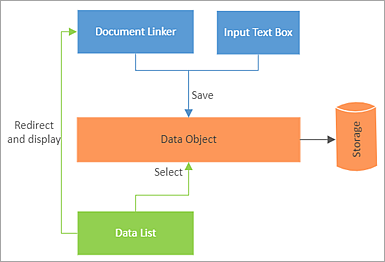
The first part of this tutorial configures a document linker to select a number of documents to be linked together and stored in a data object. In the second part, a data list control is used to select stored links and display the documents in the document linker.
Functional diagram
Configuring a document linker
Create a data object
Create a data object for the document links; you need to add at least one field to identify the links, for example a description field. For help, see Managing Data Object Structures. The example below uses a data object named MyLinkedDocuments and a field named LinkDescription.
Binding to the data object
In page designer, open the web application page where you want the document linker.
Select the Layout, and then in Properties > Data, select the data object you created from the drop-down list.
Configure a document linker
Drop a document linker control onto the page, select it, and then in Properties > Data, select the data object field (column) you created from the Data Column drop-down list.
In Properties > Appearance, change the Height parameter to 300px or more.
Add an input text box
Drop a text box control onto the page, select it, and then in Properties > Data, select the data object field (Column) you created from the Data Column drop-down list.
In Properties > Appearance > Label, change the Default Label to Link Description or similar.
Add a save button
Drop a button control onto the page, select it, and then in Properties > Behaviour set Button Type to Save.
In Properties > Appearance, change the Text property to Save.
Click Save Page.
Testing
- Select Design Preview.
- Type a description for a new link into the text box.
- Using Browse on the document linker, select one or more documents for the link.
- Click Save.
- The data object should hold a new row showing the description you typed and in column DocumentLinks, the number of documents you added:

Note | In this simple example, if you add a second link in the same browser session it will overwrite the first one—the data object SystemId will still be pointing at the first link created. In a real world example you would reset the SystemId after creating each link, for example by using fsi.setDataKey("") in the Page JavaScript.
Viewing and managing links
You use a data list to view your document links, and to make a selection. The selection initialises the document linker showing the documents in the link. This example uses a new page for the data list but you could use the document linker page.
Configure a data list
Make a new page for the data list and open it in page designer.
Drop a data list control onto the page, select it, and then in Properties > Data, select the data object and description field from the Display Table and Column drop-down lists.
If there is an unconfigured column, delete it.
With the data list still selected, in Properties > Behaviour set Redirect URL to Internal and set Internal URL to the document linker page.
Click Save Page.
Testing
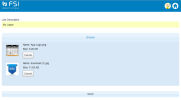
- In the data list page, select Design Preview. The data list should show the document links created.
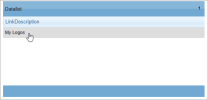
- Click a document link. The browser is redirected to the document linker page and the data object SytemId is passed across so that the document linker displays the documents in the selected link.
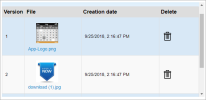
- Click an icon to download the document or click the trash can to delete it.
